skip to Main Content

Google Workspace for EDU Video

My school district was honored to have been featured in this video about Google Workspace for Education Plus for their partner CDW Amplified for Education (formerly Amplified IT).

UPDATE November, 2023: Unfortunately, the video was removed so I removed the embedded video. It was a really neat experience though.

About Wanda

Twenty-­nine year educator Dr. Wanda Terral is the Director of Technology for the Lakeland School System (TN). A former band director, Wanda is constantly seeking information relating to techniques & practices related to the use of tech to empower students and educators. A Google Certified Innovator & Trainer, she is known for widely sharing useful resources and lesson ideas on Twitter and Facebook. She earned her Doctor of Education from the University of Memphis, focusing her research on the topic of self-directed professional learning of educators. Wanda is a member of ISTE, TETA, CUE, and TCEA as well being an organizer of EdCamp Memphis. In 2016 was named the Lead PBS Learning Media Digital Innovator for the state of Tennessee and in 2019, she was named Outstanding TN CTO by the Tennessee Educational Technology Association. When not spending time with her cats, she is coding, listening to audiobooks, or sketchnoting.

Find Wanda online:

Wanda’s Furry Babies

Miscellaneous Photos

gie-summit

at-gta

glass-pres

at-google

glass

outside-of-google
KernCUE 2020

ISTE Google Playground 2019

ISTE Google Playground 2019

Edit Auto-Generated Subtitles on YouTube

Sometimes the auto-generated YouTube subtitles / captions need a bit of tweaking. Here is how to do that:

  1. Sign in to your account at https://studio.youtube.com
  2. Choose Content from the left sidebar.
  3. Hover over the video for which you wish to edit the subtitles. Click on the pencil icon to go to edit the video’s details.
edit the details for a video

4. In the right sidebar, click the pencil icon on the Subtitles button.

click the pencil icon on the subtitles button

5. Edit the subtitle text and/or adjust the timings. Save your draft frequently or you could lose your work. When everything is as you wish it to be, click DONE.

subtitle editor

The Power of NOT Done

I began my journey as a doctoral student at The University of Memphis back in 2014 and have finally reached the “done” state. There have been many obstacles along the way but with the support of many fabulous people, I have finished.

I’m not going to wax poetic because that is not my way but I did want to share a few things on my mind since yesterday’s graduation ceremony.

The speaker gave a fairly typical speech that encouraged the graduates (most of whom were in their twenties) to look forward to what their future had in store. I don’t remember who gave that speech when I graduated with my first college degree back in 1990 but I have no doubt I let my mind gravitate to what my future might be.

Yesterday, not so much.

I’m only a handful of years away from retirement and, while I know I have plenty of living left to do and plenty of impact left to have on the world, I know more and more how limited time is. I have lost many precious souls in the past 29 years since I heard my undergrad commencement speaker – including my father. I’ve lost friends / family to accidents, illness – including cancer, suicide, and even murder.

Don’t get me wrong. I feel quite celebratory in finally completing this degree. While I am not changing jobs (because I really LOVE my job), I am thinking about what extra gigs I can take on so I can have a greater impact on the world in the time I have left (and so I can pay off these new student loans!). I hope that time is a nice long block but I know, more than ever, that time is running out. It is true, I have finished my manuscript (save for minor revisions) but I am NOT done with trying to make a difference. I am NOT done with sharing things I’ve learned.

Updated info about “Remote for Slides” Chrome extension

This post has been updated (12-14-17) because the developer of this extension has addressed some issues and released an update. More updates are in the works. Thank you, Henry Lim (@henrylim96 on Twitter). 


Remote for Slides
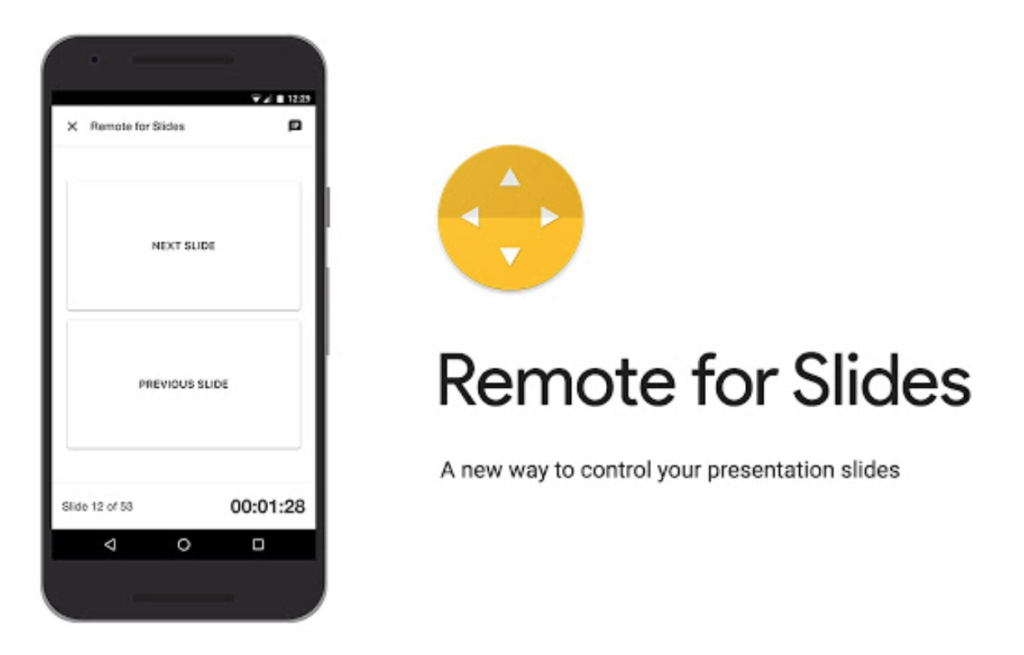
Remote for Slides (note the name change from version 1) is a great little extension and quite handy. It lets a presenter use any internet-connected device (phone, tablet, another computer) to advance slides on a Google Slide deck AND see their presenter notes without having to be on the same WIFI SSID.

The presenter has to have the extension installed in order to get a 6-digit code after going to a presenter URL.

There are several problems of which to be aware (some have been addressed and others have fixes coming).

(I am speaking more from the viewpoint of a teacher in a classroom of students. Yes, I hope the teacher is not boring their kids with a big deck of advancing slides and an old lecture format.)

ONE problem is that you DO NOT need to have to be signed into that Google account (the one doing the presenting) in order to make use of the 6-digit code. Originally, the 6-digit code displayed by default which would allow anyone in the audience to also see it and possibly take control. Now the 6-digit code is hidden by default. Just click on the SHOW ID icon and you get to see the code for about a second. You will want to do this BEFORE to start projecting.

6 digit code is hidden now
I haven’t checked yet to see if it is still possible to have two (or possibly more) controllers in possession of the deck at one time! If it is, Henry is aware and is working on a fix. 

Also, the second problem I originally mentioned will also be fixed when the person controlling the presentation has to be signed into their account.

Also, you no longer have to change the URL to activate the controller mode. A handy, dandy button is provided!

Click to use the remote
So – If you have been giving the Remote for Google Slides a try and it has been acting wonky, it may be that a person in the room has also connected to it and is controlling it.

A SECOND problem is that the URL that is used to control the slide show doesn’t change. As such, it is possible to “control” the deck even when it is not in presentation mode. Give it a try – go to this URL to control my little demo slide deck.

NOT ONLY THAT – Simply by clicking the icon in the upper-right corner of the controller, the presentation hijacker can also view all your presenter notes!

A fix for these issues might be tying it to a Google account and require the presenter to sign into their Google account to control it. Another fix may be to allow only ONE instance of a connected controller.

Hopefully, these design issues will get worked out.

In the meantime, keep that 6-digit code secret!

Thank you, Henry!


Image Template for Google Forms Header

I always have the hardest time getting a custom image header the right size in Google Forms (the “new” Google Forms, of course). I made this Google Drawing template for my use but am making it available to anyone else needing it.

Get your own copy by going to http://bit.ly/formimagetemplate. Instructions are on the sides of the drawing but here is how it works.

The image canvas is set to be 1600 x 400 pixels. There is a rectangular area that represents the center top above the form. If you put your design elements there, you will be a-ok. When you have that area the way you want it, you can delete the rectangle (unless you want to keep it visible on the form). Then, download the image as a PNG. When you upload the image into the color palette on the Google Form, set the cropping markers to match the layout of the canvas on the template.

Here is a quick video – no audio – showing the process.

Reflections of a Beginning Sketcher

For 2017 I chose to challenge myself to complete a #SketchADay for my 365 project. As a way to reinforce my #OneWord for 2017, imperfect, I also committed myself to sharing those sketches on my social media accounts (Facebook, Twitter, Google+).

Three months have past and I took some time today to look over how far my skills have grown since January 1st. You can see my sketches in this shared Google Photos Album.

I am pleased with how far I’ve come but am MOST excited by the sketches I’ve done in the past seven days.

My fellow Google Certified Innovator, Cate Tolnai, sent out an email on March 20th to some of her PLN with the idea of spreading the #SketchADay concept into a social experiment of sorts. #Sketch50 was born. Within three days, this incredible group of EDU-sketchers (of which I am honored to be a part) had social media accounts set up along with the sketch50.org domain. Daily prompts were brainstormed and collected in a Google Sheet. Images for the daily prompts were organized in Google Slide deck. The group moved from emailing as the primary form on communication to a Voxer group.

It has been beyond incredible to see how fast the idea took off. After the first day, we even had 2nd graders in Africa participating!

As I write this, we have 43 more days in #Sketch50 and I know it is going to continue to grow. So cool to think that my little 365 project had even a little bit to do with Cate getting inspired to do this.

If you haven’t joined in on the #Sketch50 movement, it is not too late. Join us. Here is how:

How to Sketch 50

If you are at all curious about how I am doing my sketches, here is a bit about my workflow:

My sketching workflow

My go-to app is Procreate for iPad. I currently have an iPad Air 2 but am seriously considering upgrading to an iPad Pro to get a bigger screen. I am currently not using a stylus. I have tried many but always return to using my finger. Haven’t given the Apple Pencil a try yet though.

I can’t recommend the Procreate app enough. It is the best $5.99 I have ever spent on an app. I really think I would not be sticking with the #SketchADay if I hadn’t taken to this app the way I have. The fabulous Sylvia Duckworth gave an impromptu sketchnoting session at ISTE 2016 and I have been hooked on Procreate ever since.

One of the best features of the Procreate app is the ability to activate the time-lapse feature. It makes it possible to export a video that shows the steps of the creation process. Here is an example, a video of the creation of the workflow sketch I posted earlier:


Three months down and nine more to go. My goals are to continue building my visual vocabulary and work into doing more larger sketches. I’ve done a few and they have been well-received but they take me quite awhile to do. I hope to develop a good workflow for that so I can get more of these ideas out of my head.

Here are some of my bigger sketches:

don't suck

corral the work like

become a grand inquisitor

help learning stick

love changes everything


Back To Top